Input Module Features
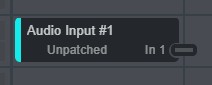
When you first add an Audio Input module to the signal-flow work area, the input is not yet patched to an audio input source.
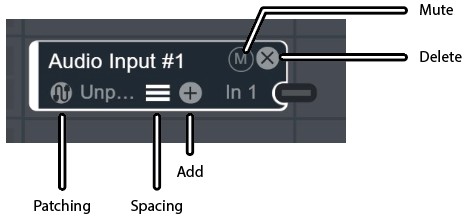
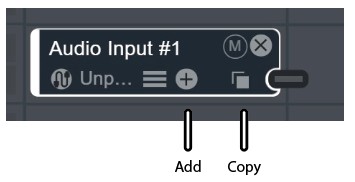
Select the input module, or hover over it, to show additional controls. These controls let you patch the input module to an audio source, adjust the module's vertical spacing, mute the audio, add a channel, copy a channel, or delete the module. The module outline turns white when selected.
Patching
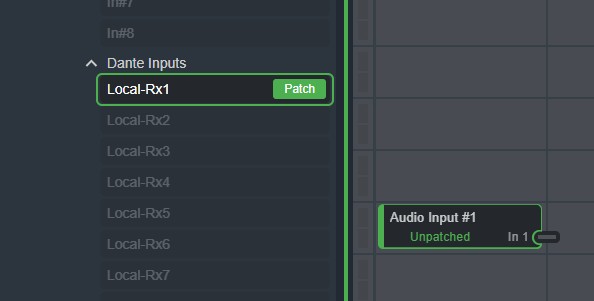
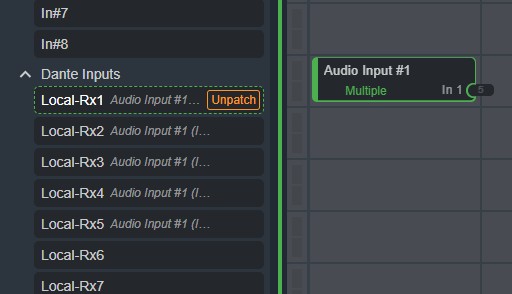
- Click the patching icon on the input module. After a short delay, Cognio shows a green highlighted column on the left with available input sources, such as Analog inputs, USB inputs, or Dante inputs. The available sources depend on the devices added to the room in Site View. If no devices have been added to the room, the list is quite long and appears under Unspecified Cognio Device.
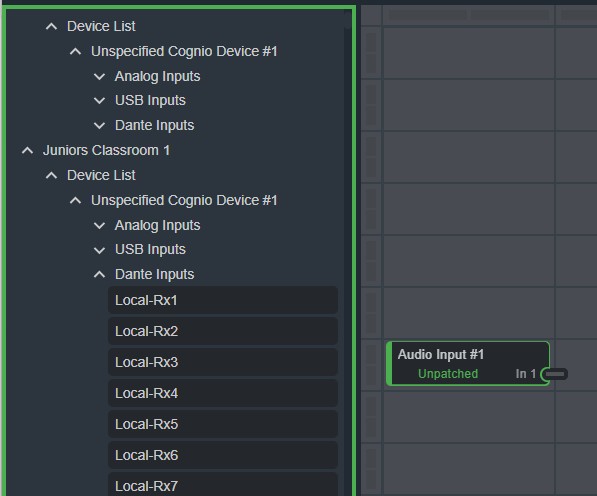
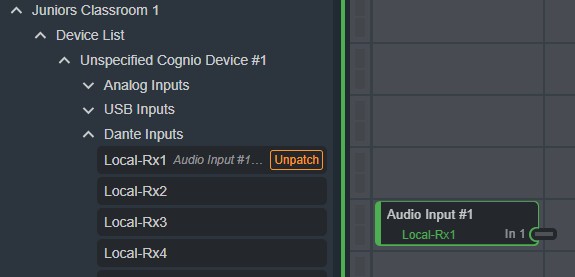
- Select the desired source from the Analog inputs, USB inputs, or Dante inputs. Click Patch to connect the source to the Audio Input module. The module name changes from Unpatched to the selected source name, such as Local Rx1.
- To undo the patch, click Unpatch, then choose another input.
Multiple Channels
Use the Properties tab to configure the Audio Input module for multiple channels. Only the Audio Input modules and the Tone and Noise Generators can change the number of channels. Other modules downstream in the signal flow receive the chosen number of channels from the Audio Input modules.
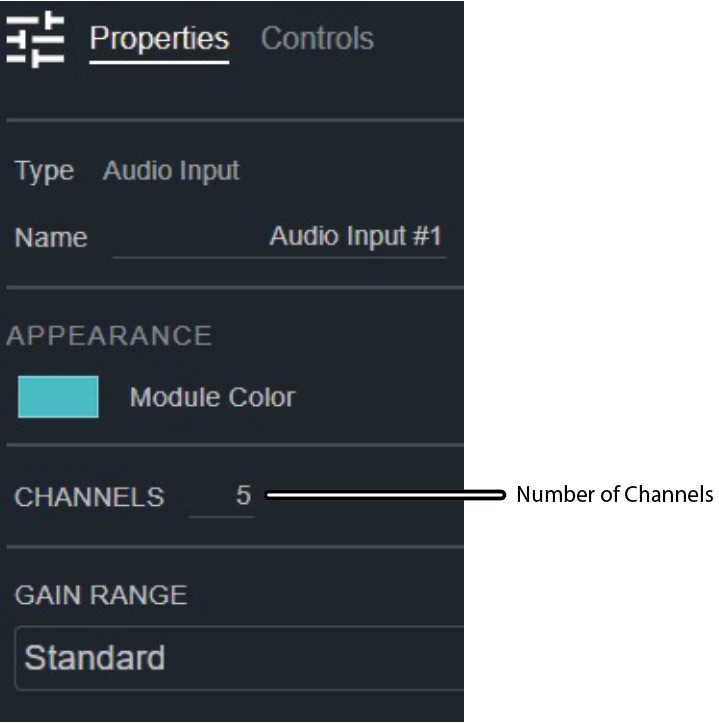
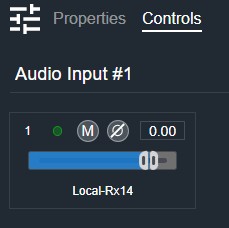
The Gain control and other settings in the Controls tab affect all channels in the module equally. In this example, one fader controls five channels.
Patching Multiple Channels
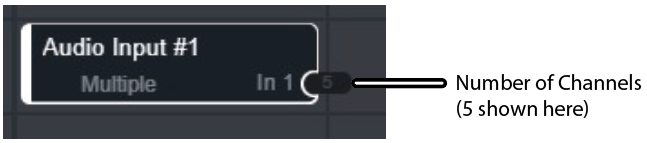
If the Audio Input module has more than one channel, such as two channels for stereo or five channels as shown, patching automatically selects the correct number of channels. The module shows Multiple instead of the input source name. The channel count appears at the right of the module.
As you add other modules in the signal-flow work area, the five channels continue through the signal flow. Each link between modules shows 5.

Adding an Input Source
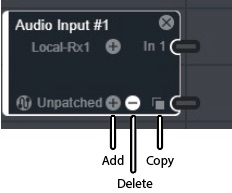
- Hover over the module to show the plus sign. Click the plus sign to add another input source. Repeat this step to add more input sources.
- Patch each input source the same way as before, by clicking its patching icon and choosing an input source.
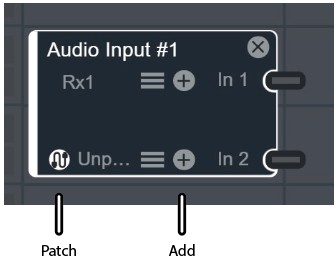
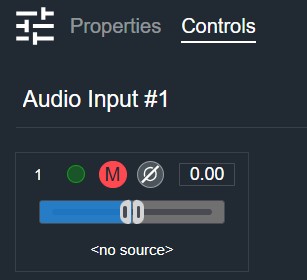
- Use the Controls tab to adjust each input source's individual gain and other controls.
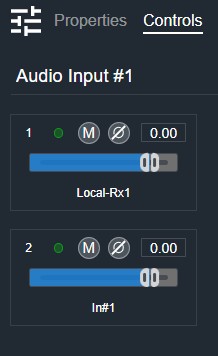
Deleting an Input Source
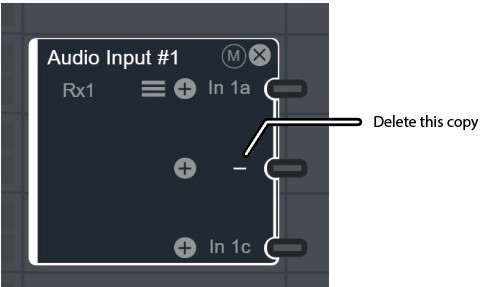
Hover over the module, near the plus sign, to show a minus sign and a square copy icon. Click the minus sign to delete that input source, or click the plus sign to add another one.
Copying an Input
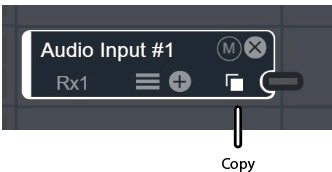
- Hover over the module input you want to copy. A square copy icon appears in place of the input number. Click the copy icon to copy the input, and click it again to create another copy. For example, In 1 changes to 1a, 1b, 1c, and so on. The module controls affect each copied input equally.
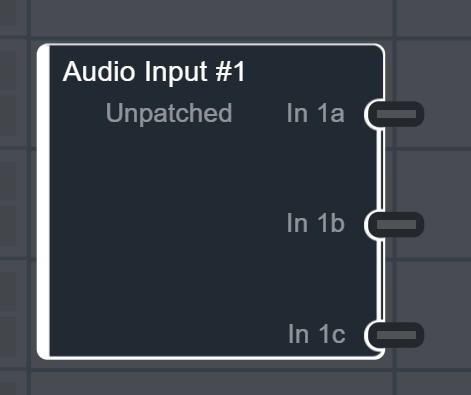
- To delete a copied input, click its label, such as 1b, to show the minus sign. Click the minus sign to remove 1b. The remaining 1a and 1c are renumbered to 1a and 1b.
Adjusting the Row Spacing
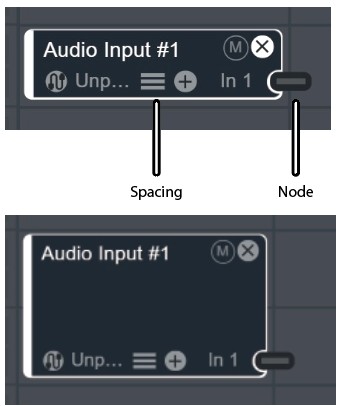
Extra space can be added to a module to shift the vertical position of the input connections. This can help when you make connections to other modules in the signal flow. Hover over the module to show the spacing icon, then grab and drag it to achieve the desired spacing. You can also adjust the spacing by dragging a node up and down. Any modules below move automatically as the spacing changes in the module above.
Muting the Module
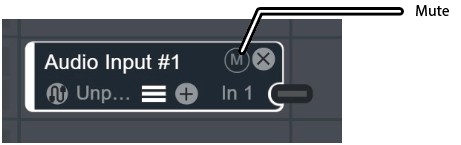
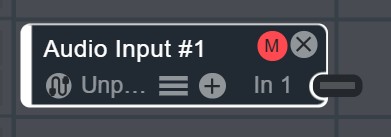
Hover over a module to show an M in the top corner. Click the M to mute the module's audio output. The M turns red, and a red M appears in the Controls tab.
Deleting a Module
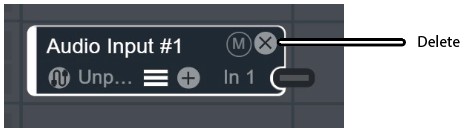
Hover over the module, then click the X in the top-right corner to delete the module. Press Ctrl+Z to undo the deletion.